Easier shopping is here!

For those that wanted easier shopping, click on the shopping tab above or visit http://www.amychomas.com/

We are now taking credit card payments, or you can still use paypal! Any questions, you can send them to amyc222@yahoo.com

Want to learn how to use your new holders? Look to the right of my blog to see everything in categories!


Saturday, October 30, 2010

The AMAZING Maria is at it again!!!

I love when Maria from Believe Dream Create gets out her Gypsy and the Chomas Creations products cause she never fails to amaze me! Look at this AWESOME sign she did with the Chomas Creations mini gel pen holder, and the Chomas Creations embossing kit!


You can get more details on Maria's blog here... Believe Dream Create  I can't wait to see what she does next! 
Like what you see? Leave a comment to let me know!

Friday, October 29, 2010

Happy Halloween card with Chomas Creations mini gel pen holder!

On October 31st, 1975 I was all decked out in a cute clown costume my mommy hand made for me, getting ready to go Trick or Treating. Well that didn't work out as my sister decided this would be the day she would make her appearance! Of course I wasn't very happy with her that year, but I've forgiven her since then hehe! So this is going to be her birthday card this year. I used Happy Hauntings to draw haunted house and happy halloween with the Chomas Creations mini gel pen holder and the silver metallic mini gel pen. I just love the way the silver shows up on black! The little ghosts and paper are both Making Memories.


Hope everyone has a SPOOKtacular Halloween!  I'm taking the weekend off as there will be spooky visits to a haunted street, and possibly a trip to the cider mill, and of course some good old Trick or Treating (my fav!!! Hope the kids can keep up this year hehe)
Like what you see? Leave a comment to let me know!

Wednesday, October 27, 2010

Baby Steps with Chomas Creations mini Sharpie holder

I think one of my fav parts of the mini Sharpie holder (besides the fact that it has a fine tip) is that there are 24 different colors of mini Sharpies available out there and I can always find a shade to match whatever project I'm doing!  Here is a simple layout of my little guy learning to walk (he is 4 now, eeeek!).  I drew the robot designs in Design Studio and layered them, and drew the little robot and gears with the Robotz cart on Quickutz metal sheets.  Then without removing the  mat, I changed out the mini Sharpie holder for the blade housing, and cut around them.  Super easy! 


Like what you see? Leave a comment to let me know!

Tuesday, October 26, 2010

So sweet with mini gel pen holder and metallic gel pens

One of my fav parts about Make-the-Cut is the ability to trace anything and be able to draw or cut it!  I downloaded these sketched flowers from the internet and traced them in MTC!  Then I added my Chomas Creations mini gel pen holder with the light blue metallic gel pen from the asssorted pack, and drew the sketched flowers right onto my background paper.  Notice how they even look sketched!
Next are the clouds, now these I sketched myself with my Wacom tablet and then traced them in MTC and cut them out!
So that means a share!  If you want these files for Make-the-Cut, here ya go...
clouds
flower doodles The flowers are at the very bottom of the mat. 
Here is a close up of the flower doodles on my page...


And here are the clouds with the title!  The font is 2 peas flea market.

And here are my cute niece and nephew in one of my very fav pictures of them to complete the page!

Like what you see? Leave a comment to let me know!

Monday, October 25, 2010

Embossing with vellum and the Chomas Creations adjustable pen holder

For this page I made some pretty little embossed flowers..  You can use the stylus in the Chomas Creations adjustable pen holder with the embossing mat.  I used multi-cut 3 as this was a pretty thick vellum.  When you add a darker color behind the vellum it really makes it POP!
My niece's name is Addi, so I highlighted Addi in glitter! 
The paper and embellies are all Making Memories. 


Like what you see? Leave a comment to let me know!

Saturday, October 23, 2010

100% boy with Chomas Creations mini Sharpie holder

Who has mini Sharpie holders available for the Cricut?  I DO I DO!  lol  Gotta love them on metal sheets, vinyl, transparencies, vellum!  No smearing, no bleeding either!  And did you know they come in 24 different colors???
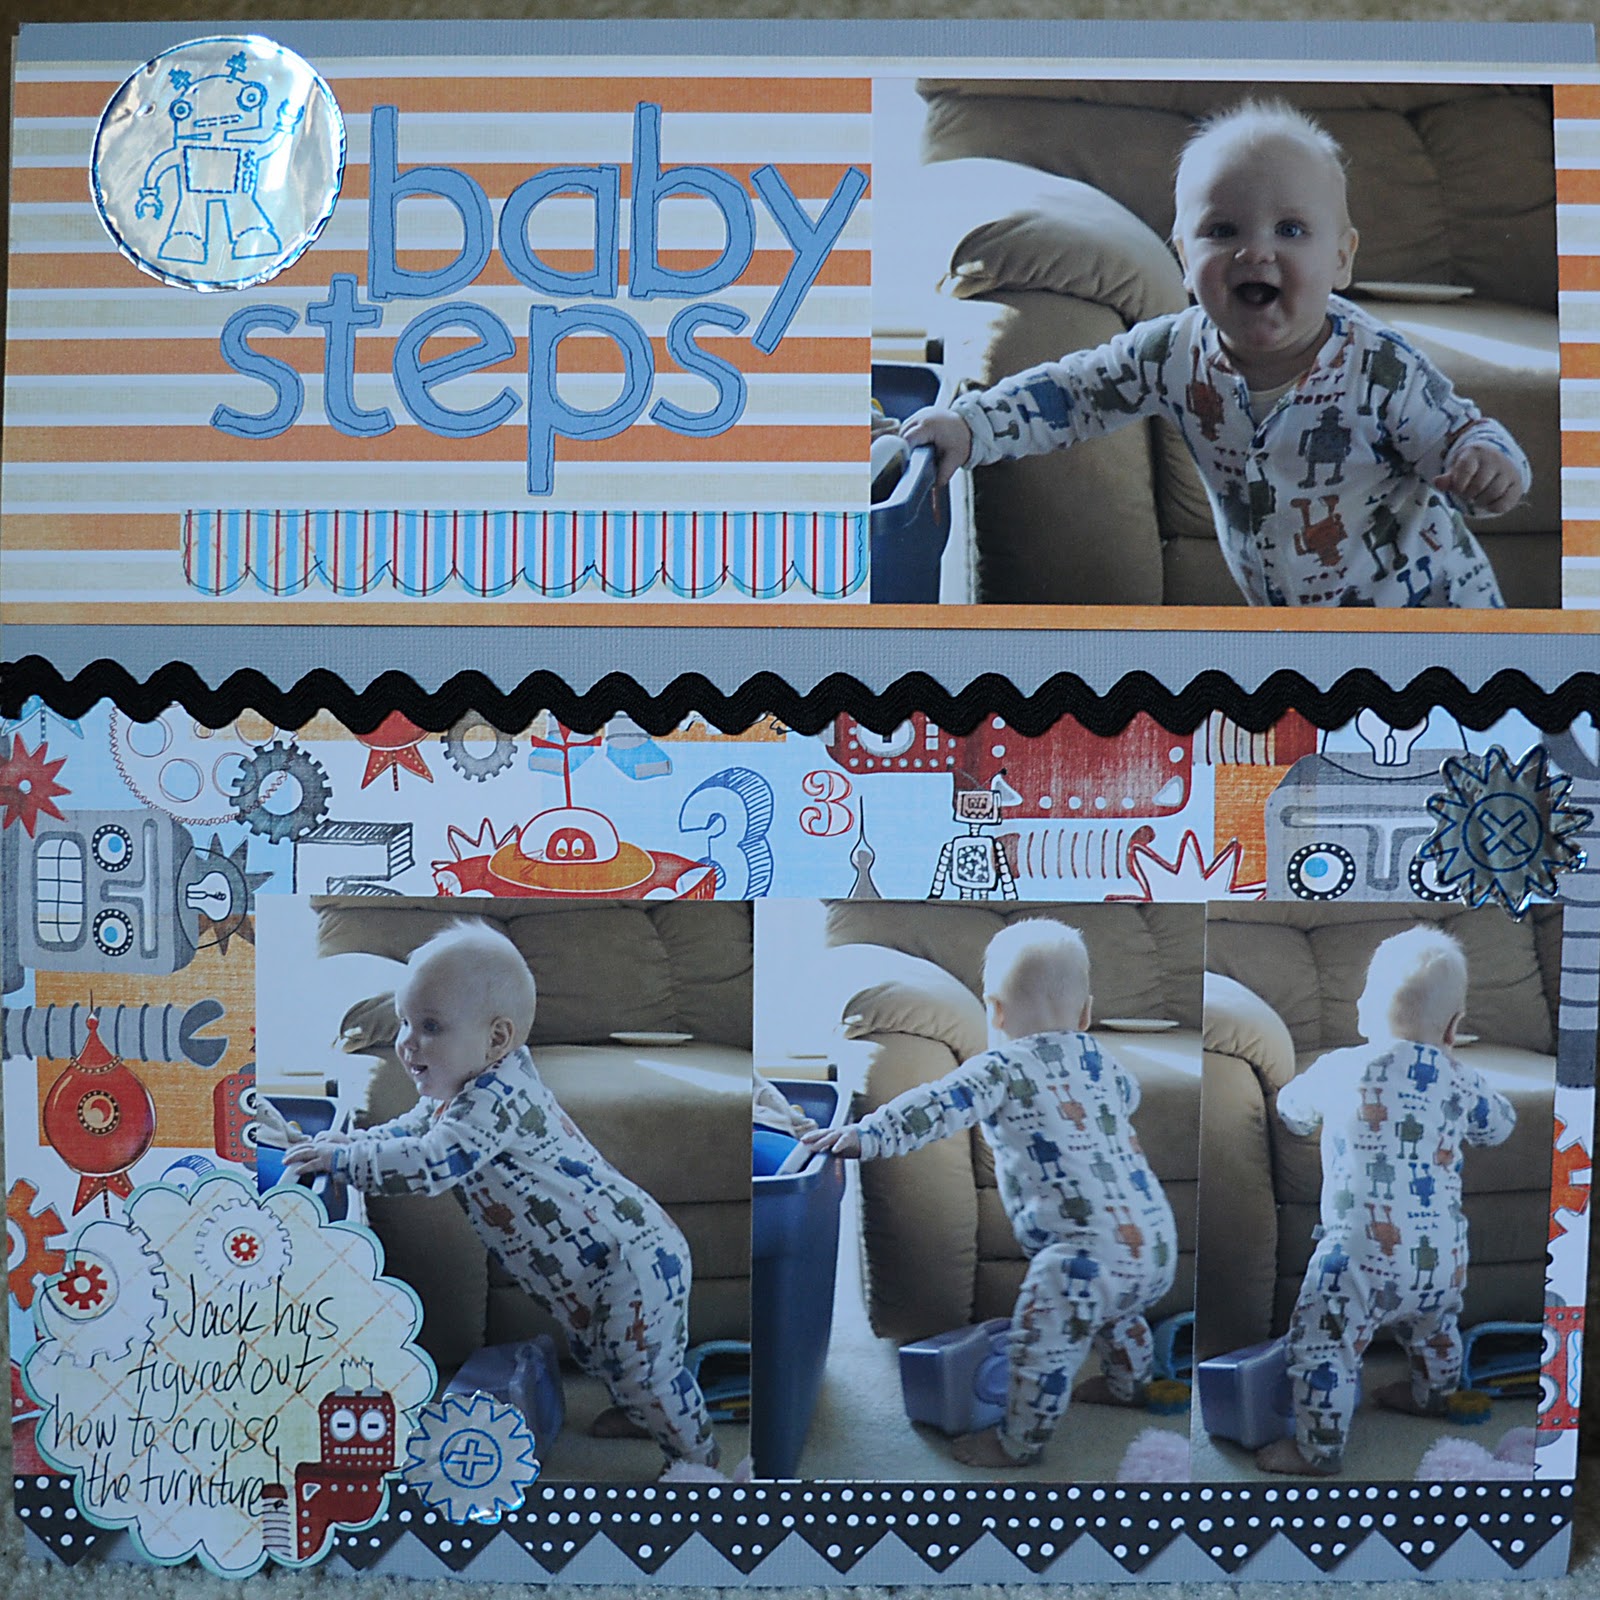
Here is a page of my youngest boy, who is ALL BOY!  Loving all the titles for boys on this cartridge, they so fit my Jack.  For this one I used the orange mini Sharpie on the Quickutz metal sheet.  I like using Design Studio for these kinds of designs, cause that way I can cut on one layer, and draw with another layer.
This is the layer for all of my cuts.  I load it up with scrap paper so I can get it all done in one try.


Here is the layer I have set up to do my drawing, I have it labeled draw layer.  Without removing the mat, I carefully remove the blade (don't move the blade carriage or the draw lines won't line up), set the pressure to minimum, and draw the draw page.


Then I layer all my cuts, and put together the page, here is the result!  You can download this file for use with Design Studio and Boys will be boys here... 100% boy file


Like what you see? Leave a comment to let me know!

Special this weekend on the mini gel pen holder with mini gel pens!

I have an awesome deal this weekend on the mini gel pen holder when you order mini gel pens!  For $27.50 you can get the mini gel pen with either 10 glitter gel pens, or 10 assorted gel pens, price includes shipping!  Or for $32.50 you can get the mini gel pen holder with all 20 mini gel pens!  Price includes shipping!  Just click on the box to the right for a drop down menu.

Like what you see? Leave a comment to let me know!

Friday, October 22, 2010

First day of preschool with Chomas Creations mini gel pen holder

One of my favorite things to do with the Chomas Creations mini gel pen holder is to make my own background paper, which I did here!  In Design Studio, using just George, I designed graph paper, now anytime I want my own graph paper I can add a piece of cardstock to the mat and draw it out!  The graph paper is available for download here for free... graph paper download
This is my youngest off to his first day of preschool, and the only reason he was pouting was because I wanted to take a picture before we left, he was READY to go lol!  I drew the graph paper with the Chomas Creations mini gel pen holder and the blue metallic mini gel pen.  The title was cut with Plantin, which I also designed with Design Studio.  Look how easy it was to hand journal right on the graph paper to! 


Like what you see? Leave a comment to let me know!

Thursday, October 21, 2010

We now offer the embossing tip seperately!

I've had a few requests for the embossing tip to be purchased seperately, and it is now available on my blog, just click on the box that says embossing kit for Cricut and a pop up menu will appear where you can add the embossing tip alone to your cart.  The tip alone is $20, that price includes shipping.
Below is an idea for those allergic to the latex mat.
I also want to mention that I do ship outside of the US!  Some of my items for sale are already priced for shipping out of the US, but if you have any questions, feel free to ask!

Originally my research and development (fancy title, hehe) was done with the silicone sheets Cricut sells to cut stamps with the Cricut.  They are 6x6 square, and 2 come in a pack. 
So for those allergic to latex, this is a good alternative.  Don't mind my messy piece of silicone here (research & development  does that around here lol), but this is to give you an idea of how well it works.


Like what you see? Leave a comment to let me know!

PDA! With Chomas Creations embossing kit

I get a lot of grief from my 16 year old for showing my hubby any affection!  She'll yell PDA (public display of affection) and turn the other way, or run out the room like she is grossed out!  So I couldn't resist doing this page for her, she cracked up when I showed her hehe!
I designed the border with Design Studio and Doodletype, replacing the "o" with hearts instead!  Because the hearts and "x" won't be backwards when you emboss, I didn't need to worry about flipping this design.  I then embossed it with the Chomas Creations embossing kit on the Ten Second Studios metal sheet.  I did put the metal color side down so I could sand off the debossed part of the image. 
I then used the scallopped border punch on the bottom or my border!  It worked perfectly!
I also cut the title with Doodletype.  The papers are all Basic Grey's Olivia line as well as the brads and stickers.


Like what you see? Leave a comment to let me know!

Wednesday, October 20, 2010

A trip to the Cider mill with Chomas Creations embossing kit and Make-the-Cut

It has been a tradition in our family for years, the cider mill trip!  And the reward is the same yummy cider and doughnuts I remember growing up!
For this layout I used the Chomas Creations embossing kit for the apple tree and apples.  It is a Doodlebat font from Lettering Delights called DB Woodsy, which is perfect for fall, and I used Make-the-Cut to emboss it!  The Appletini metal sheet is from Ten Second Studios.
I also designed the title in Make-the-Cut, and the background is part of the basic shapes.
All of the papers are October Afternoon.


Like what you see? Leave a comment to let me know!

Tuesday, October 19, 2010

Trick or Treat for the Silhouette

Here is a layout that I designed for Custom Crops with the Silhouette & the Chomas Creations mini gel pen holder for the Silhouette and the silver glitter mini gel pens.  Look how awesome they work on black! 
You can see the layout here... Trick or Treat as well as the directions and a cut file for the journaling boxes! 

Like what you see? Leave a comment to let me know!

Monday, October 18, 2010

Have no fear!

I'm still around!  I don't feel like I've neglected my blog like this in a long time, but at my house, I was dealing with a 4 year old with the croup all weekend!  UGH!  He is on medication and I'm hoping he'll be feeling better tomorrow and possibly to go school so I can get some things done around here!

Like what you see? Leave a comment to let me know!

Friday, October 15, 2010

Chicago or Bust with Chomas Creations embossing kit!

Last year the whole family was lucky enough to go to Chicago with the grandparents!  It was a fun filled weekend, and by filled, I mean FILLED!  We crammed a lot into just 48  hours! 
The first fun part of the trip was the train ride!  I cut the title with Make-the-Cut, and also found the railroad tracks on google, downloaded them, and did a pixel trace in MTC!  I then used the Chomas Creations embossing kit to emboss on the Ten Second Studios metal sheet (colored side down) and used a Scotch Brite pad to sand the color of the debossed image!  I cut the metal in half with my guilotine cutter so it would span the 2 pages. 
The papers are all Basic Grey's Oliver line.  Click on any of the images to see them larger.


Like what you see? Leave a comment to let me know!

Thursday, October 14, 2010

Some bunny loves you!

I wanted to send a super cute pick me up to my Gramps and this is what I came up with! I so love the Create A Critter cart, the animals on there are too cute, especially when you add googly eyes to them hehe! I designed the title in Design Studio with Lyrical Letters, and drew it with the Chomas Creations mini gel pen holder and the new pink glitter mini gel pen. The papers are Basic Grey's Green at Heart. I hope it brightens his day!


Like what you see? Leave a comment to let me know!

Wednesday, October 13, 2010

Gramps and his Joes

I have a lot of fonts, a LOT of fonts on my computer. That is why I like Make the Cut, I have the ability to use any of these fonts on a page! So here is one of me, my brother, my sister (who he lovingly refers to us as the "Joes") and my Gramps (one of the most important people in my life, if we could all be just a bit more like him!)
The font I chose was LD Typset, and I welded it together in Make the Cut. The papers are all October Afternoon, they have some awesome paper lines!
The apple border was embossed with the Cricut on Ten Second Studios metal sheets as well with the Chomas Creations embossing kit.